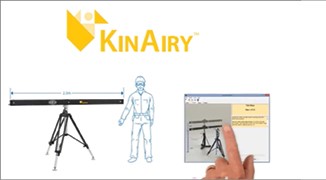
Laser tracker end-users can now test their instruments in the field with the simplified, internationally approved ISO 103660 10:2021 process in less than 30 minutes.
The new ISO interim testing process allows end-users to monitor tracker performance on their shop floor before the next big measurement job, or as a routine component of tracker maintenance.
Brunson Instrument Co. updated the KinAiry Field Testing Solution to accommodate the new ISO procedure.
The KinAiry system features a 2.3m reference bar custom-tailored to precision requirements of ISO interim field testing. The three-piece, transportable artifact is kinematically mounted to provide the required stability. KinAiry software guides the user through the process, which results in a graph that portrays tracker conformance to manufacturers’ specifications.
Watch KinAiry in action: https://www.youtube.com/watch?v=zBxWLsAcgVc
Tube bender

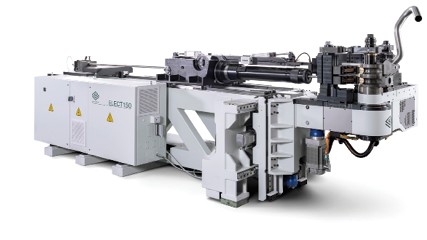
Left-hand configuration capability has been added to Elect 102, 130, and 150 bender models which all include right-hand configuration. Fabricators processing tubes with diameters of up to 6" can choose the bending direction they use most.
With multiple tool stack capability, the Elect benders can produce fixed and variable radii in a single setup. The all-electric operation provides energy-efficient production and eliminates the need for hose and piping associated with hydraulic systems, helping simplify maintenance and improve reliability for consistent bending. The 9-axis or 10-axis systems are suitable for aerospace tube production.
The Elect benders are available with manual or automatic loading with the ability to position the automatic loader to the left or right of the machine. Additionally, a special loading cycle is available for heavy tube or multi-ball mandrels. The BLM Elect tube benders can incorporate automatic tube bundle loading and a handling robot for a turnkey solution that manages the entire tube loading and unloading sequence.
Thermally stabilized machining center

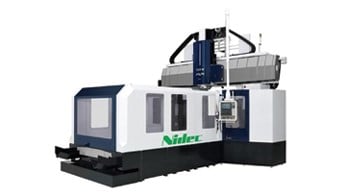
The MVR-Hx series offers ease of use without needing thermal displacement for high precision and high efficiency. It’s equipped with thorough thermal countermeasures, such as an internal spindle cooling system that suppresses thermal expansion of the spindle and the main structure is less susceptible to environmental temperature changes. It can also be used for dies, molds, or other machining requiring high surface quality, to general parts machining, and for materials from light to heavy cutting.
The internal spindle cooling system is standard. The tooltip position can be stabilized at high speeds of 8,000rpm, and the step between tools during finish machining is reduced to <3.5µm. When heavy-duty cutting at 4,000rpm, the gear-driven spindle enables machining at a maximum torque of 3,430N·m, as the main structure made of cast metal enhances the rigidity for stable machining at high torque. The rapid traverse speed is 35m/min for the Y-axis and 20m/min for the Z-axis.

Explore the January February 2022 Issue
Check out more from this issue and find your next story to read.
Latest from Aerospace Manufacturing and Design
- Lockheed Martin completes Orion for Artemis II
- Cylinder CMMs for complex symmetrical workpieces
- University of Oklahoma research fuels UAS development
- Motorized vision measuring system
- Everyone's talking tariffs
- Boom Supersonic to launch Symphony engine testing in Colorado
- Next-generation precision measurement solution
- #60 - Manufacturing Matters: What's ahead in manufacturing in 2025?


